Phono Cartridge Rebuilding

Welcome To ONEILL ENGINEERING ((1))WATERPUMP REBUILDING ((2))FORD F1 MASTER CYLINDER CONVERSION ((4))FORD 3/4 HUBS ((6))1949 Ford E-Brake ((8))Phono Cartridge Rebuilding ((9))Ford Flathead Generator repair ((10))Flathead Distributor ((11))Lifting a Flathead ((12))Flathead starters ((13))F2 Brake parts ((14))'49 Ford pedal bushings ((15))02' Pontiac 5.7 PCV tube ((16))02' GM horns ((18))02' FIREBIRD window motor ((20))AO Smth Rebuild ((21))A.O.SMITH PART 2 ((22))AO SMITH BEARING ((24))Plastic Panel Repair ((25))HomeBrew Growler ((33))GM Power Antenna ((34))Power Antenna in Camaro ((35))Fbody power seat switch ((36))2002 ws6 ls1 oil pan removal ((37))C5 hvac auto manual ((38))2018 GM wipers ((39))American Flyer wick replacement ((40))wood column replacement ((41))Fogger repair ((43))Lionel 1615 repair ((44))Ives 3254 reverse unit repair ((46))Craftsman Circular Saw 336.27963 ((50))RCP 802 Tube Chart ((51))RCA 103 Speaker ((52))Atwater Kent Power Supply ((53))1928 ATWATER KENT MODEL 40 ((54))TEST EQUIPMENT

Phono Cartridge Rebuilding

Rebuild your 1930's/1940's crystal phonograph cartridge for very little $$. Its not as bad as it looks, take your time and it will work and sound fine. I used small machine screws and nuts vs. rivets so that I can check out the condition of the internals on occasion. Parts required: Modern cartridge donor (1950s/1960s) mono preferred, rubber hand gloves, crazy glue. An addition amp was not required and the new cartridge works fine.

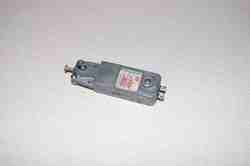
FINISHED CARTRIDGE

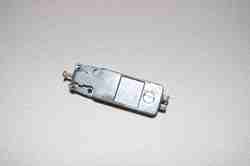
Top Side

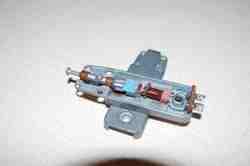
Internals, parts inserted and glued together. Make sure there is a soft insulator(rubber glove) between element and needle. This adds low tones.

Internal parts. Glue all items together with crazy glue. You can use plastic to make clamps for the element. Making rubber insulators by cutting gloves and a sharp razor blade.