AO Smith Motor Rebuild
Welcome To ONEILL ENGINEERING
((1))WATERPUMP REBUILDING
((2))FORD F1 MASTER CYLINDER CONVERSION
((4))FORD 3/4 HUBS
((6))1949 Ford E-Brake
((8))Phono Cartridge Rebuilding
((9))Ford Flathead Generator repair
((10))Flathead Distributor
((11))Lifting a Flathead
((12))Flathead starters
((13))F2 Brake parts
((14))'49 Ford pedal bushings
((15))02' Pontiac 5.7 PCV tube
((16))02' GM horns
((18))02' FIREBIRD window motor
((20))AO Smth Rebuild
((21))A.O.SMITH PART 2
((22))AO SMITH BEARING
((24))Plastic Panel Repair
((25))HomeBrew Growler
((33))GM Power Antenna
((34))Power Antenna in Camaro
((35))Fbody power seat switch
((36))2002 ws6 ls1 oil pan removal
((37))C5 hvac auto manual
((38))2018 GM wipers
((39))American Flyer wick replacement
((40))wood column replacement
((41))Fogger repair
((43))Lionel 1615 repair
((44))Ives 3254 reverse unit repair
((46))Craftsman Circular Saw 336.27963
((50))RCP 802 Tube Chart
((51))RCA 103 Speaker
((52))Atwater Kent Power Supply
((53))1928 ATWATER KENT MODEL 40
((54))TEST EQUIPMENT
((55))Bosch Model 48
AO Smith motor rebuild USQ1152 1 1/2 hp
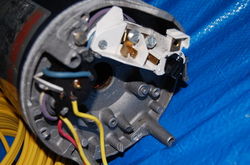
Rear of motor taken apart. Clutch switch and amature shaft removed.
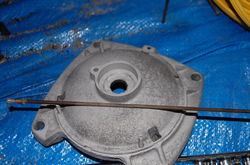
Square motor end flange with 8-32 bolt shown. AO smith does not sell these 10.75" long bolts, I used 8-32 threaded rod from home depot $5.
8-32 threaded rod inplace
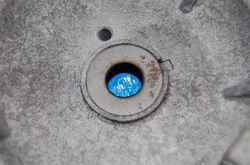
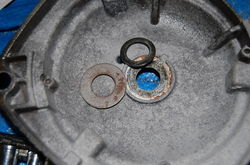
This seal is located in the front of the motor on the square flange. Its a 5/8" i.d. steel washer with a 5/8" i.d. x 1/16" thick rubber washer inside. I bought the rubber washer from Mcmastercarr for $1
You can pop the old washer out using a screw driver in the flat slot. I used RTV to glue the pieces back in place.
Most of the time the 8-32 bolts will break off. Heat with a torch and use a vice-grip to remove or drill and tap to 8-32. These are thru holes so on assembly use anti-seize and RTV to block the thru holes.
Armature shown with new bearings installed. Also shown is the bearing puller. I thought about cutting the bearings off the shaft because they were seized but an automotive tie-rod puller worked fine. NOTE: there are 2 snap rings that hold the front bearing in place so make sure you remove all of the clips before pulling the bearings.
Free
Feel free to download and use images.
